STARS
Purpose
This guide aims to help you navigate and make the most of the NTU STARS, which is our module selection and registration site. This is a site that you will become very familiar with over the course of your education here in NTU. The site aims to help NTU students plan and deconflict their modules for the upcoming semeter, as well as register for the modules.
While students can plan their modules at any time before they register for them, there are only 2 time slots when students can register for modules. The first is the designated time slot given to you (which you can check here) and the second is the Add-Drop Period during the first 2 weeks of school.
For Incoming Freshmen, NTU will automatically register your first semester core modules for you. You will have to register your elective modules by yourself during Add-Drop period so that you have some idea how to use the STARS system before you register for your own modules.
The STARS system works on a fastest fingers first principle. It is definitely not the best system but it is what we have. There will be occasions when you and your friends will be in different timeslots so try your best to be the fastest finger possible.
Key Concepts
Terminology
For the purposes of this guide, I will use the terms Course and Module interchangeably. Each Module has a course code that you can use to find more details of the course. Each course will have Indexes that will tell you when the lectures, tutorials and labs are. Each index has its own unique combination of tutorials and labs which might be held at different venues and times so do take note to pick those that fit your schedule.
Conflicts
The school is willing to waive off schedule conflicts IF AND ONLY IF there is a lecture involved in the conflict, or if the course is a core and has to be taken in that semester only. Their rationalisation is that you can watch the lecture later while still attending your tutorials or labs. They will not entertain lab-tutorial conflicts as you should be available for both of these contact times.
There have also been times, especially in Y1S2 where there will be a clash between a SPMS module and a SCSE module. Since both of these modules are cores, are pre-requisites to other modules and have to be cleared in Y1S2, the school will waive the clash. Please check with the school for the specifics of your situation as they have attempted to deconflict the modules as much as possible.
There is also special consideration given to Year 4 students that are graduating and need the waivers in order to graduate within the year.
As of AY21/22, the school has implemented a new system for requesting waivers by the means of a Microsoft Form. You should not be emailing the school anymore with regards to conflicts and waivers unless strictly necessary. Your requests will not be paid attention to until after Course Registration.
Pink Form
The school requires you to fill up a Pink Form if you want to overload your semester beyond the 21 AU cap or take modules that are not supposed to be taken in the current semester. You will have to speak to your academic mentor and have him/her sign off on your request as well as get the approval of the Associate Chair (Academic). The form is availble here and will only be processed during Add-Drop period.
This form is not necessary for Year 4s as they take special consideration for graduating students that need to complete their courses to graduate.
Using STARS
Accessing the System
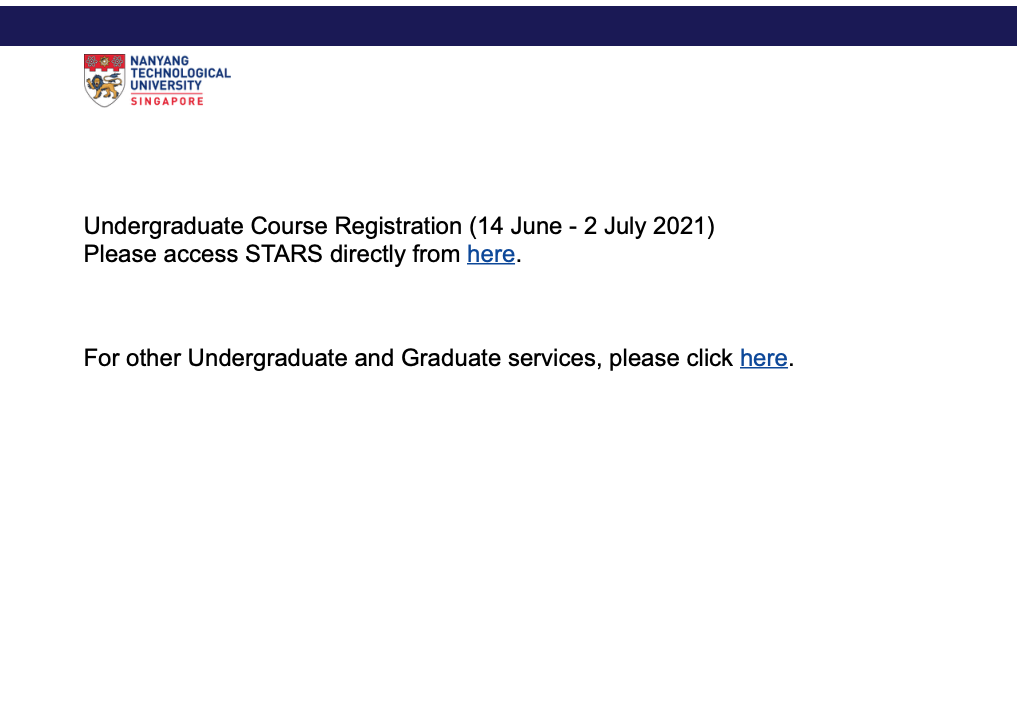
The first step to accessing the system is to go to the StudentLink site available here. You will see the screen below (the dates will be updated for you). Click on the first hyperlink to be directed to the Login for the STARS system.
Selecting Modules
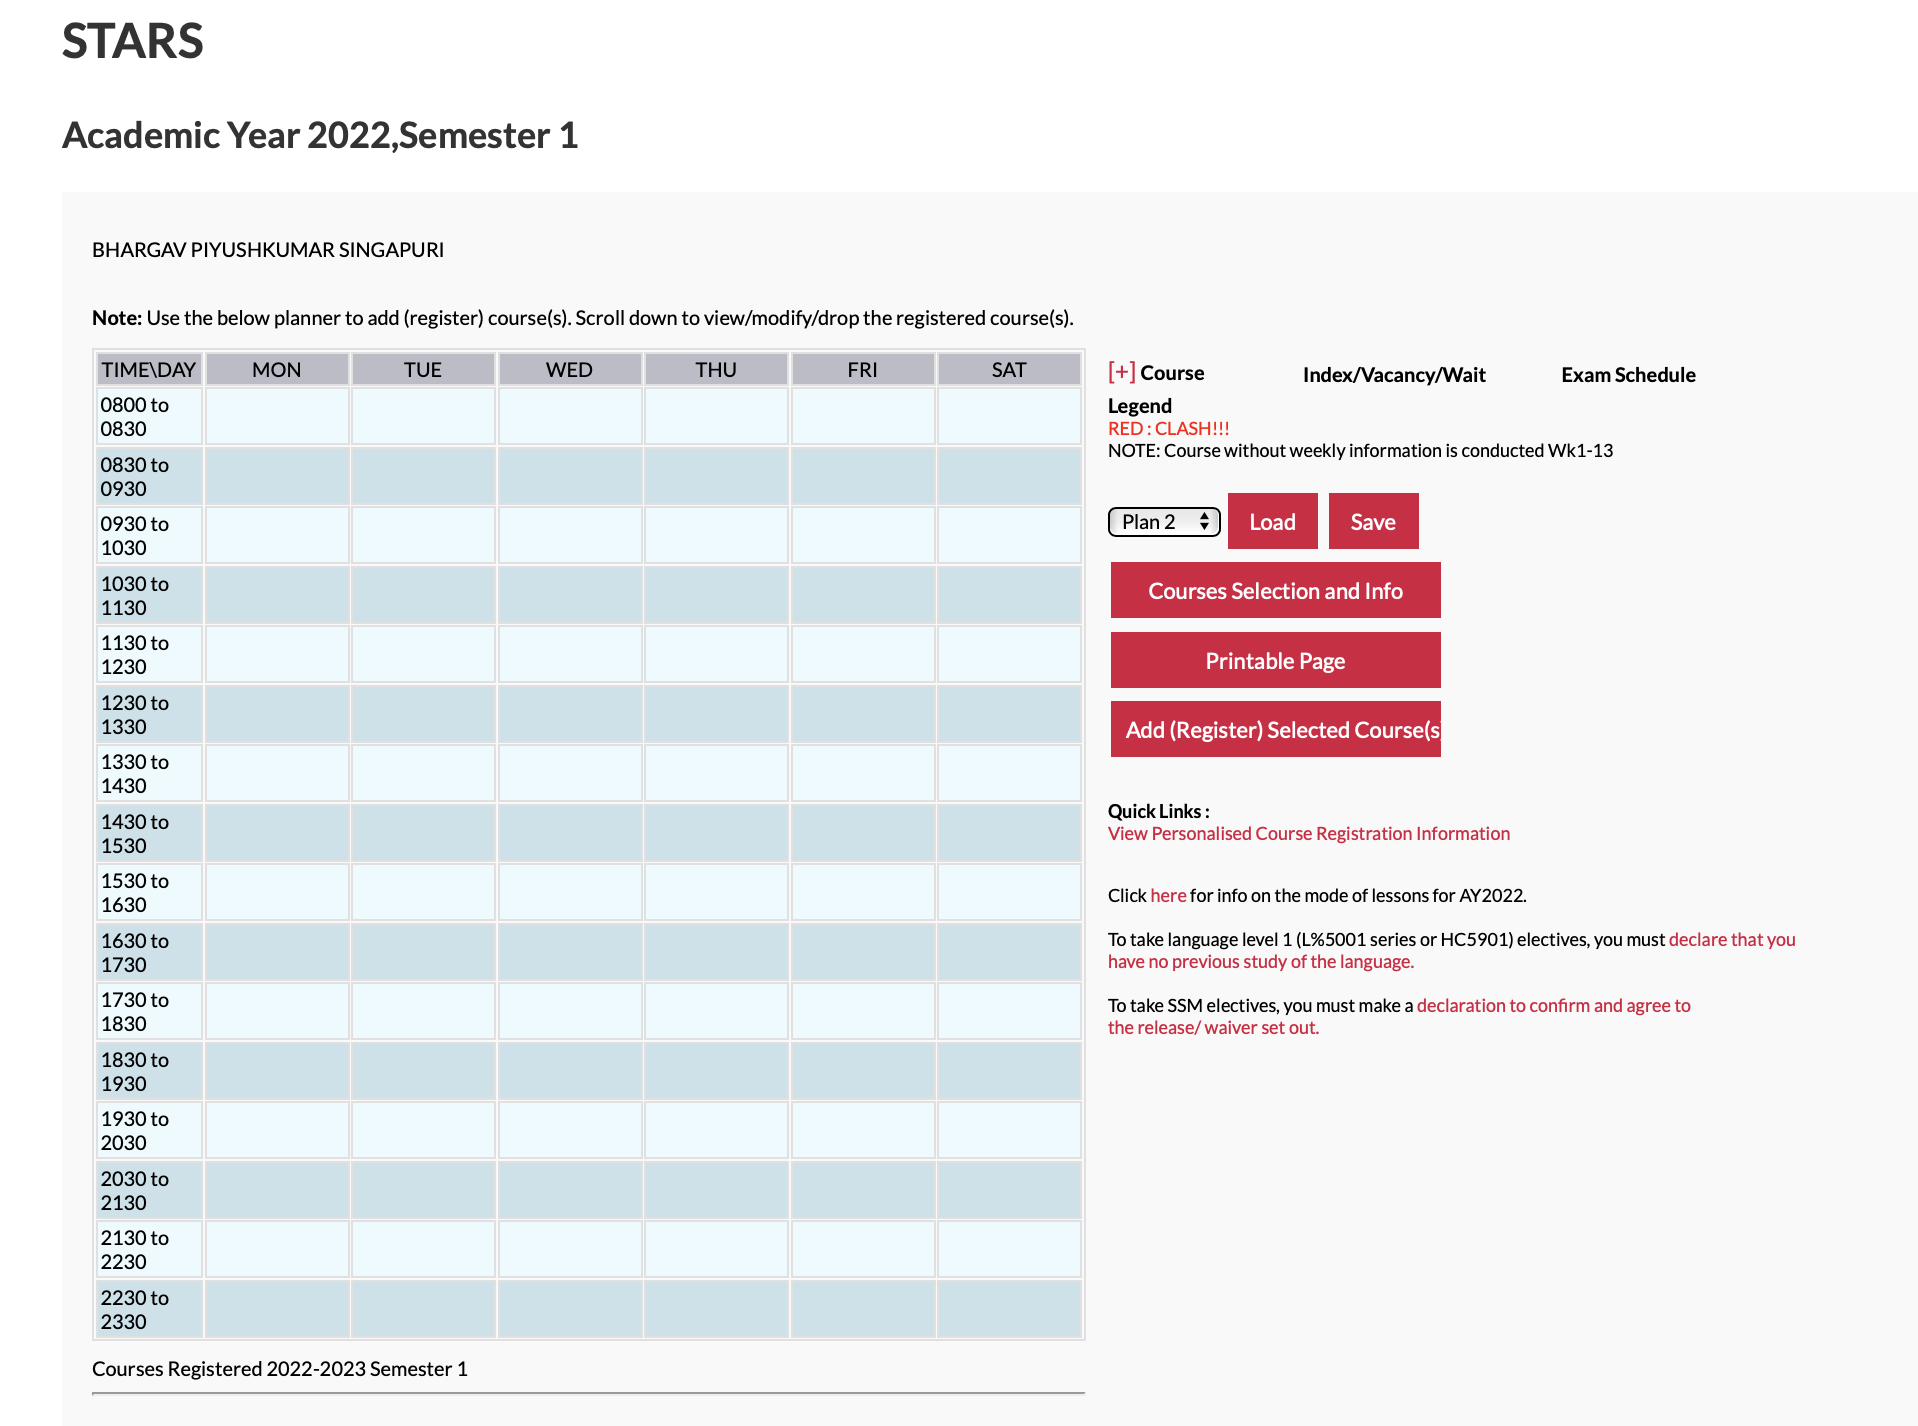
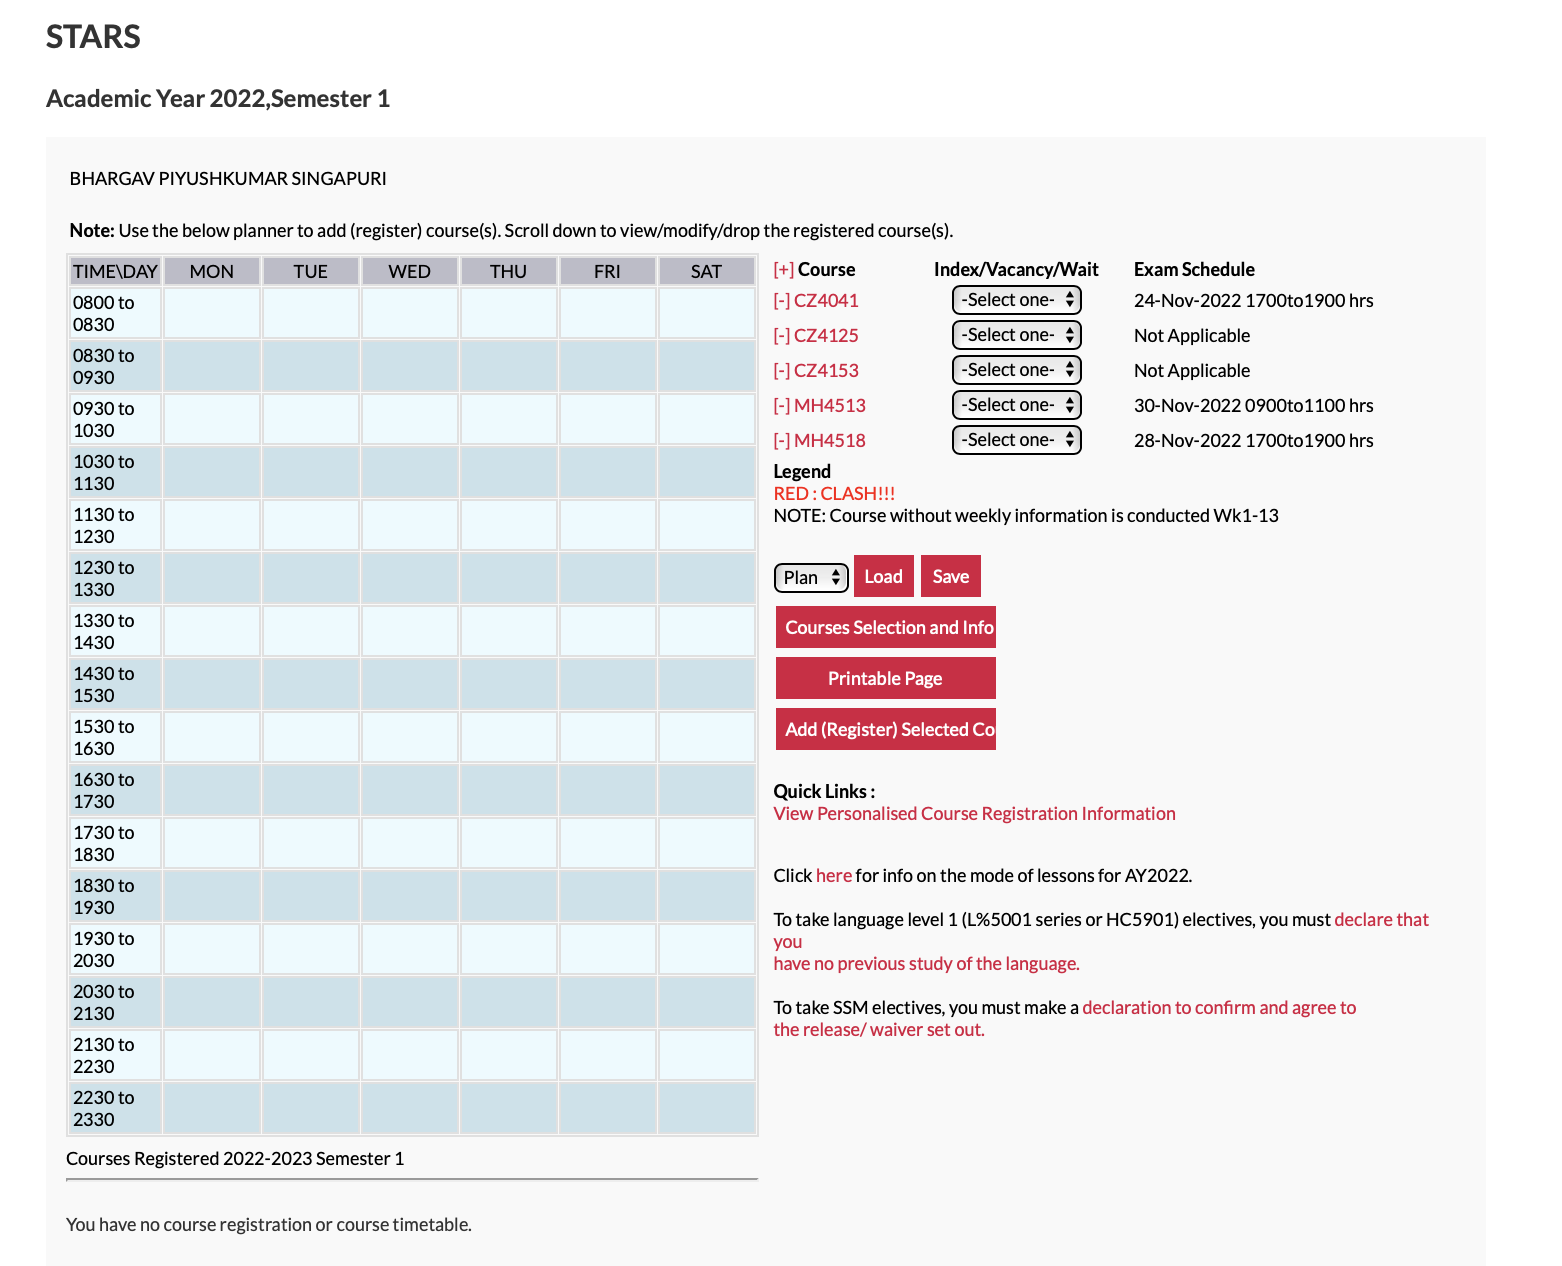
After logging in, you will see the follwing page. This is the Calendar page of the STARS system. All the courses that you have added so far will be displayed here. It displays your current timetable, and the courses you have registered for at the bottom of the page. You also have the ability to save multiple plans if for some reason you do not end up getting the timeslot that you want. To add courses to your current plan, click on Courses Selection and Info to go to the Selection/Info Page.
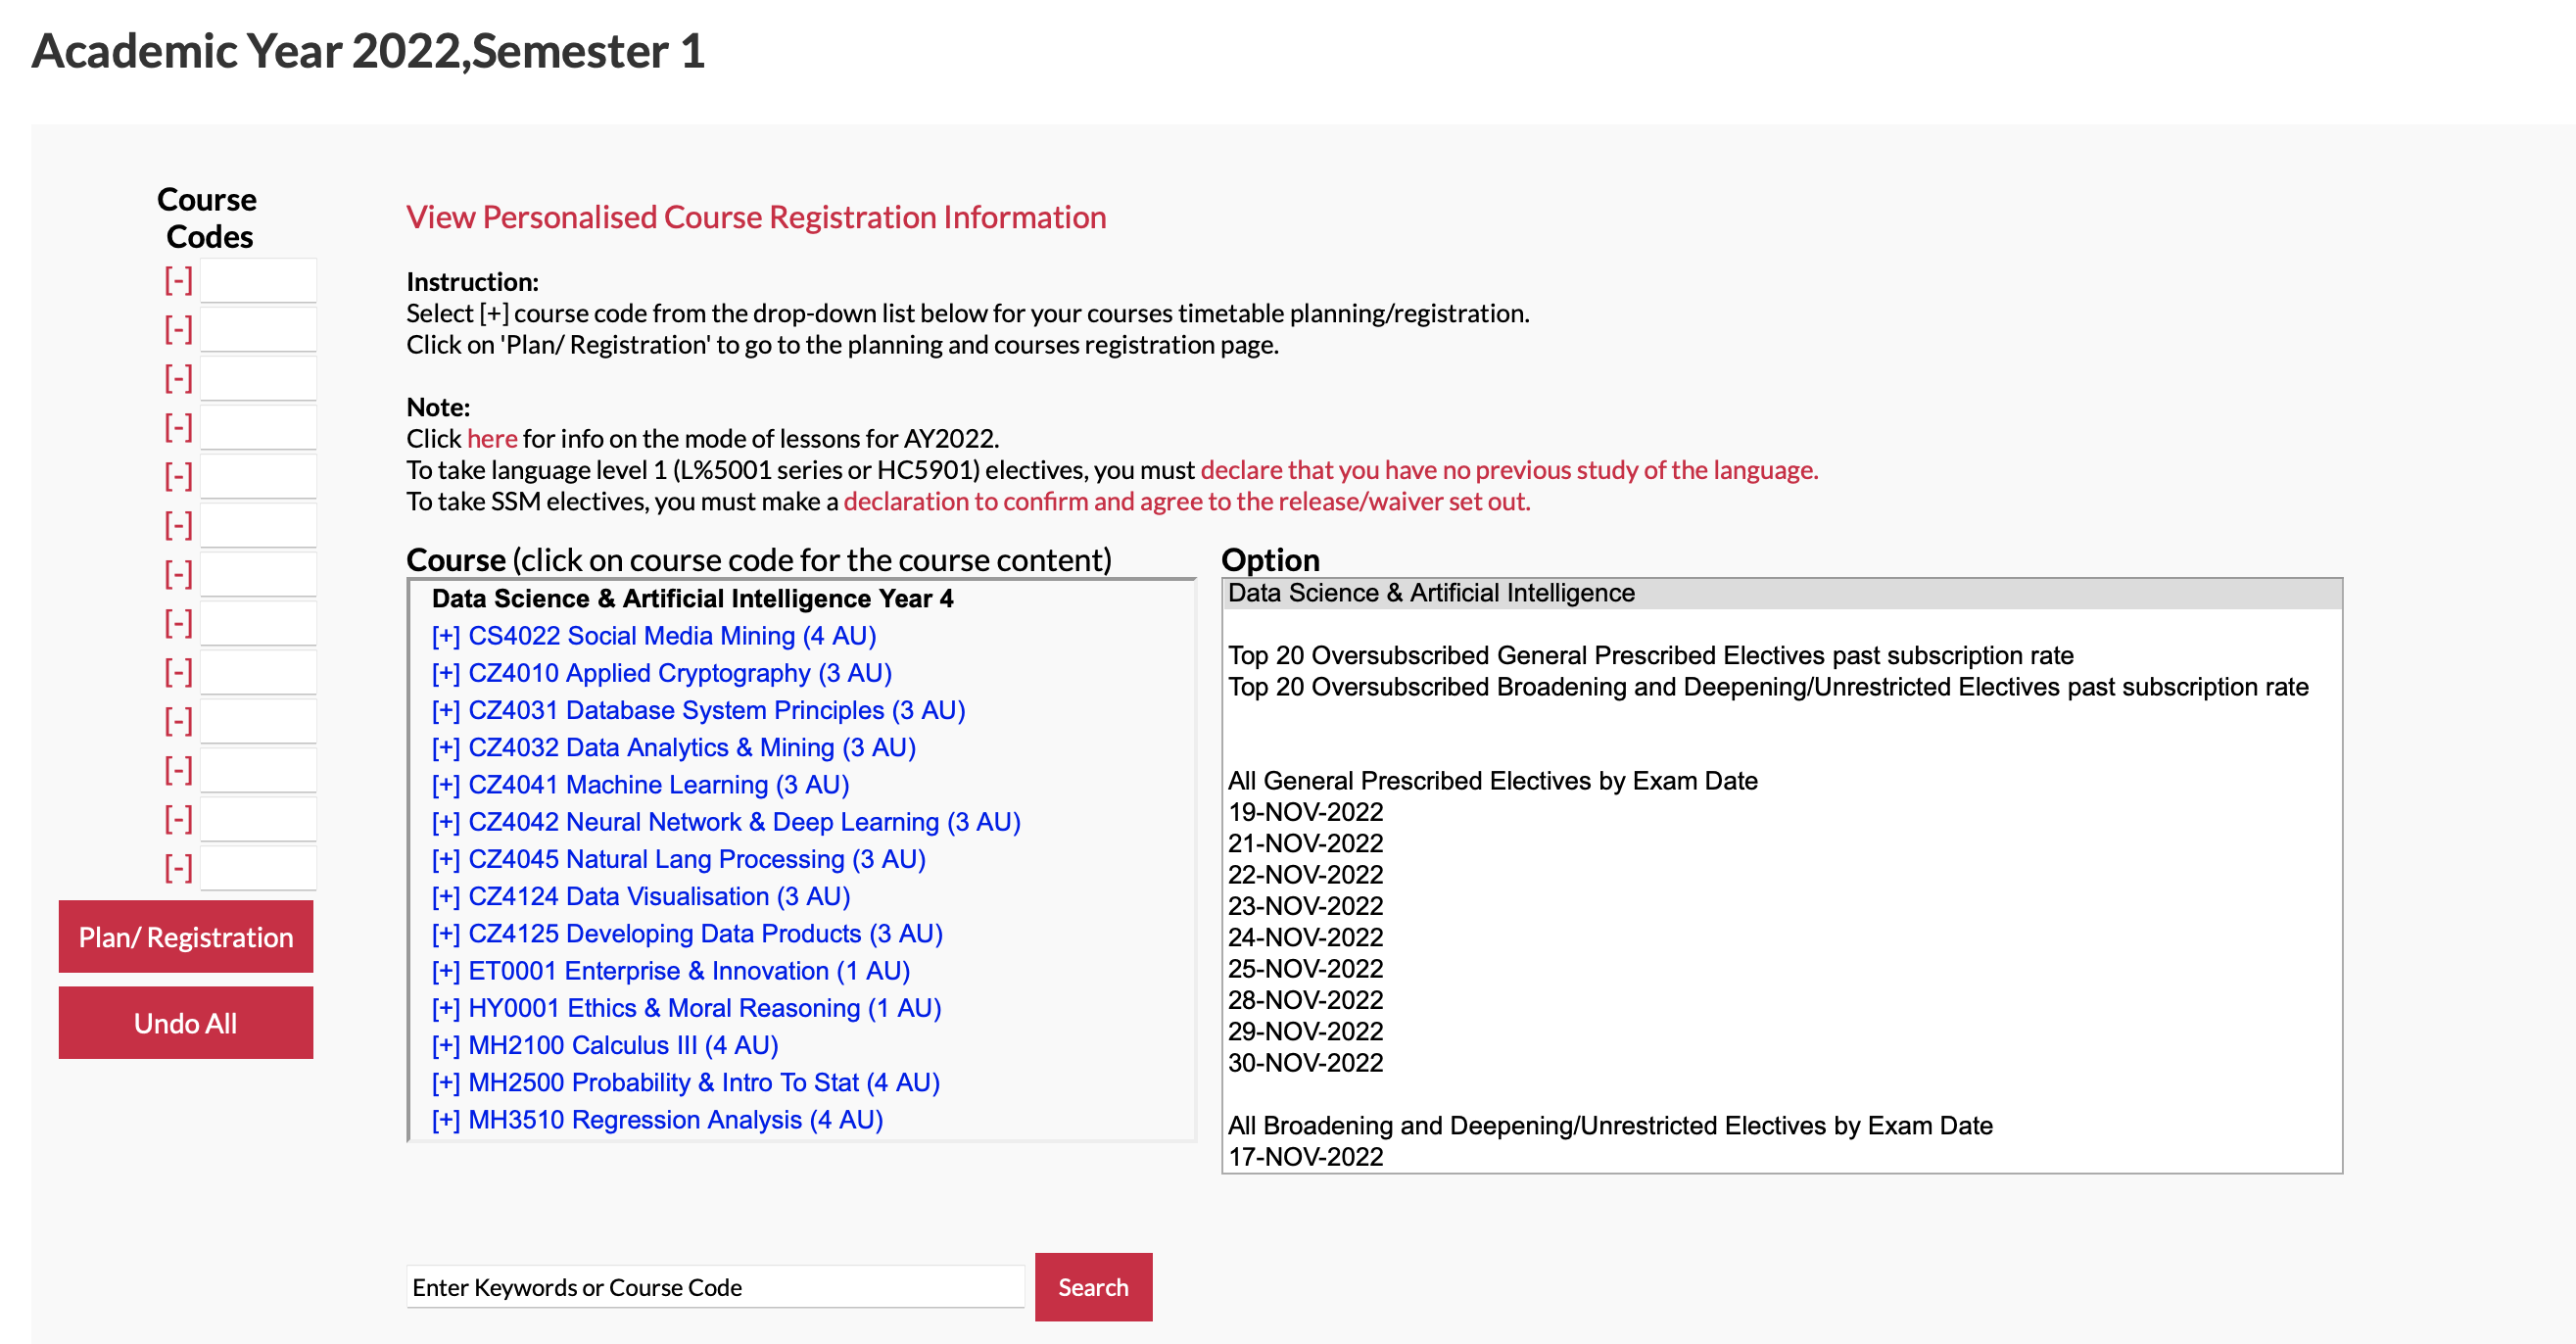
You will then see the following screen. You can use the various grouping Options on the right hand side to try and find the course that you are looking for. The course options will be displayed on the left hand side. You can press the + button to add the course to your plan.
Index Details
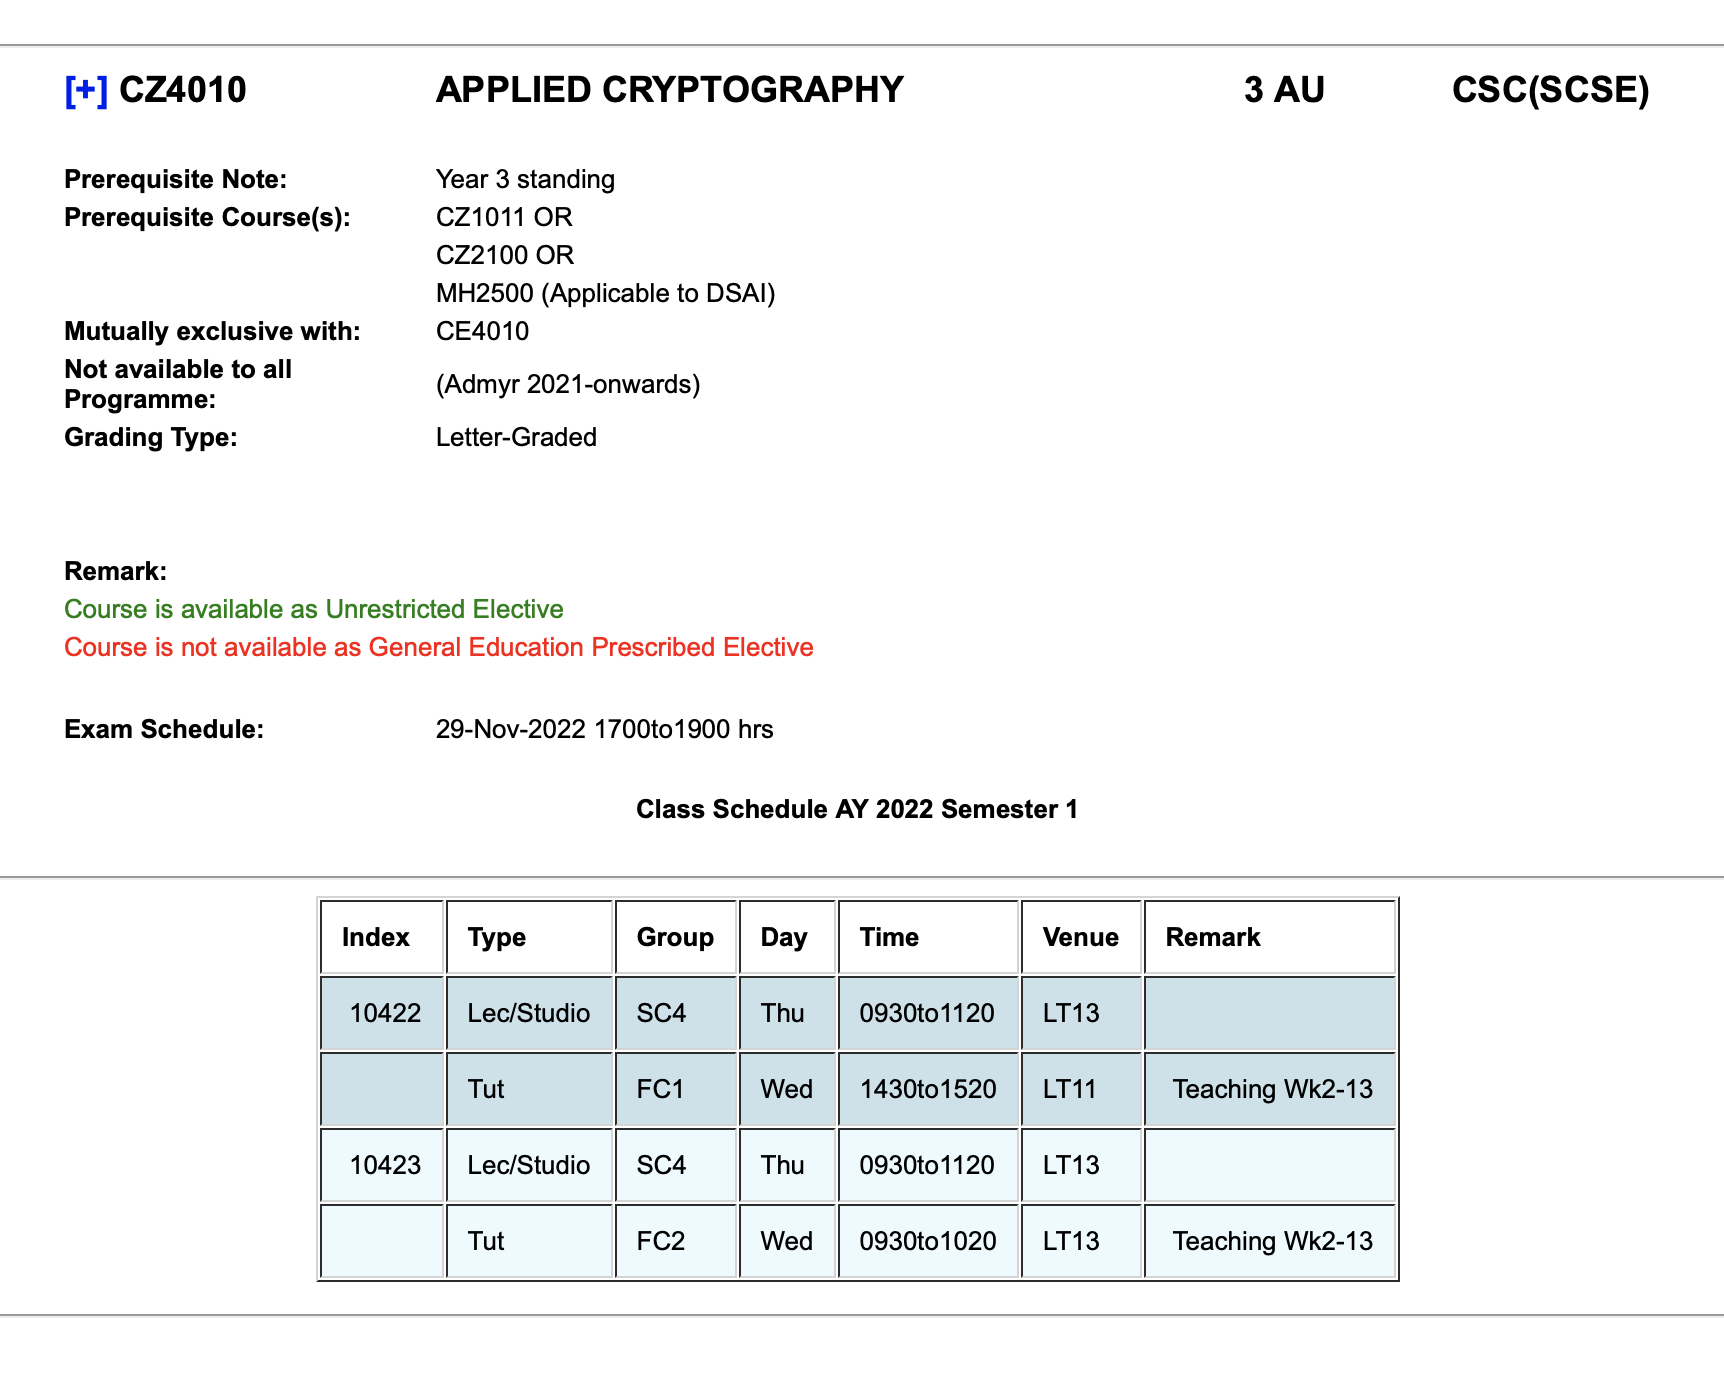
You can also view more details about a course by clicking the title of the course in the screen above. It will show you the degrees that can take the course, pre-requisites as well as the indexes associated with the course.
Selecting Indexes
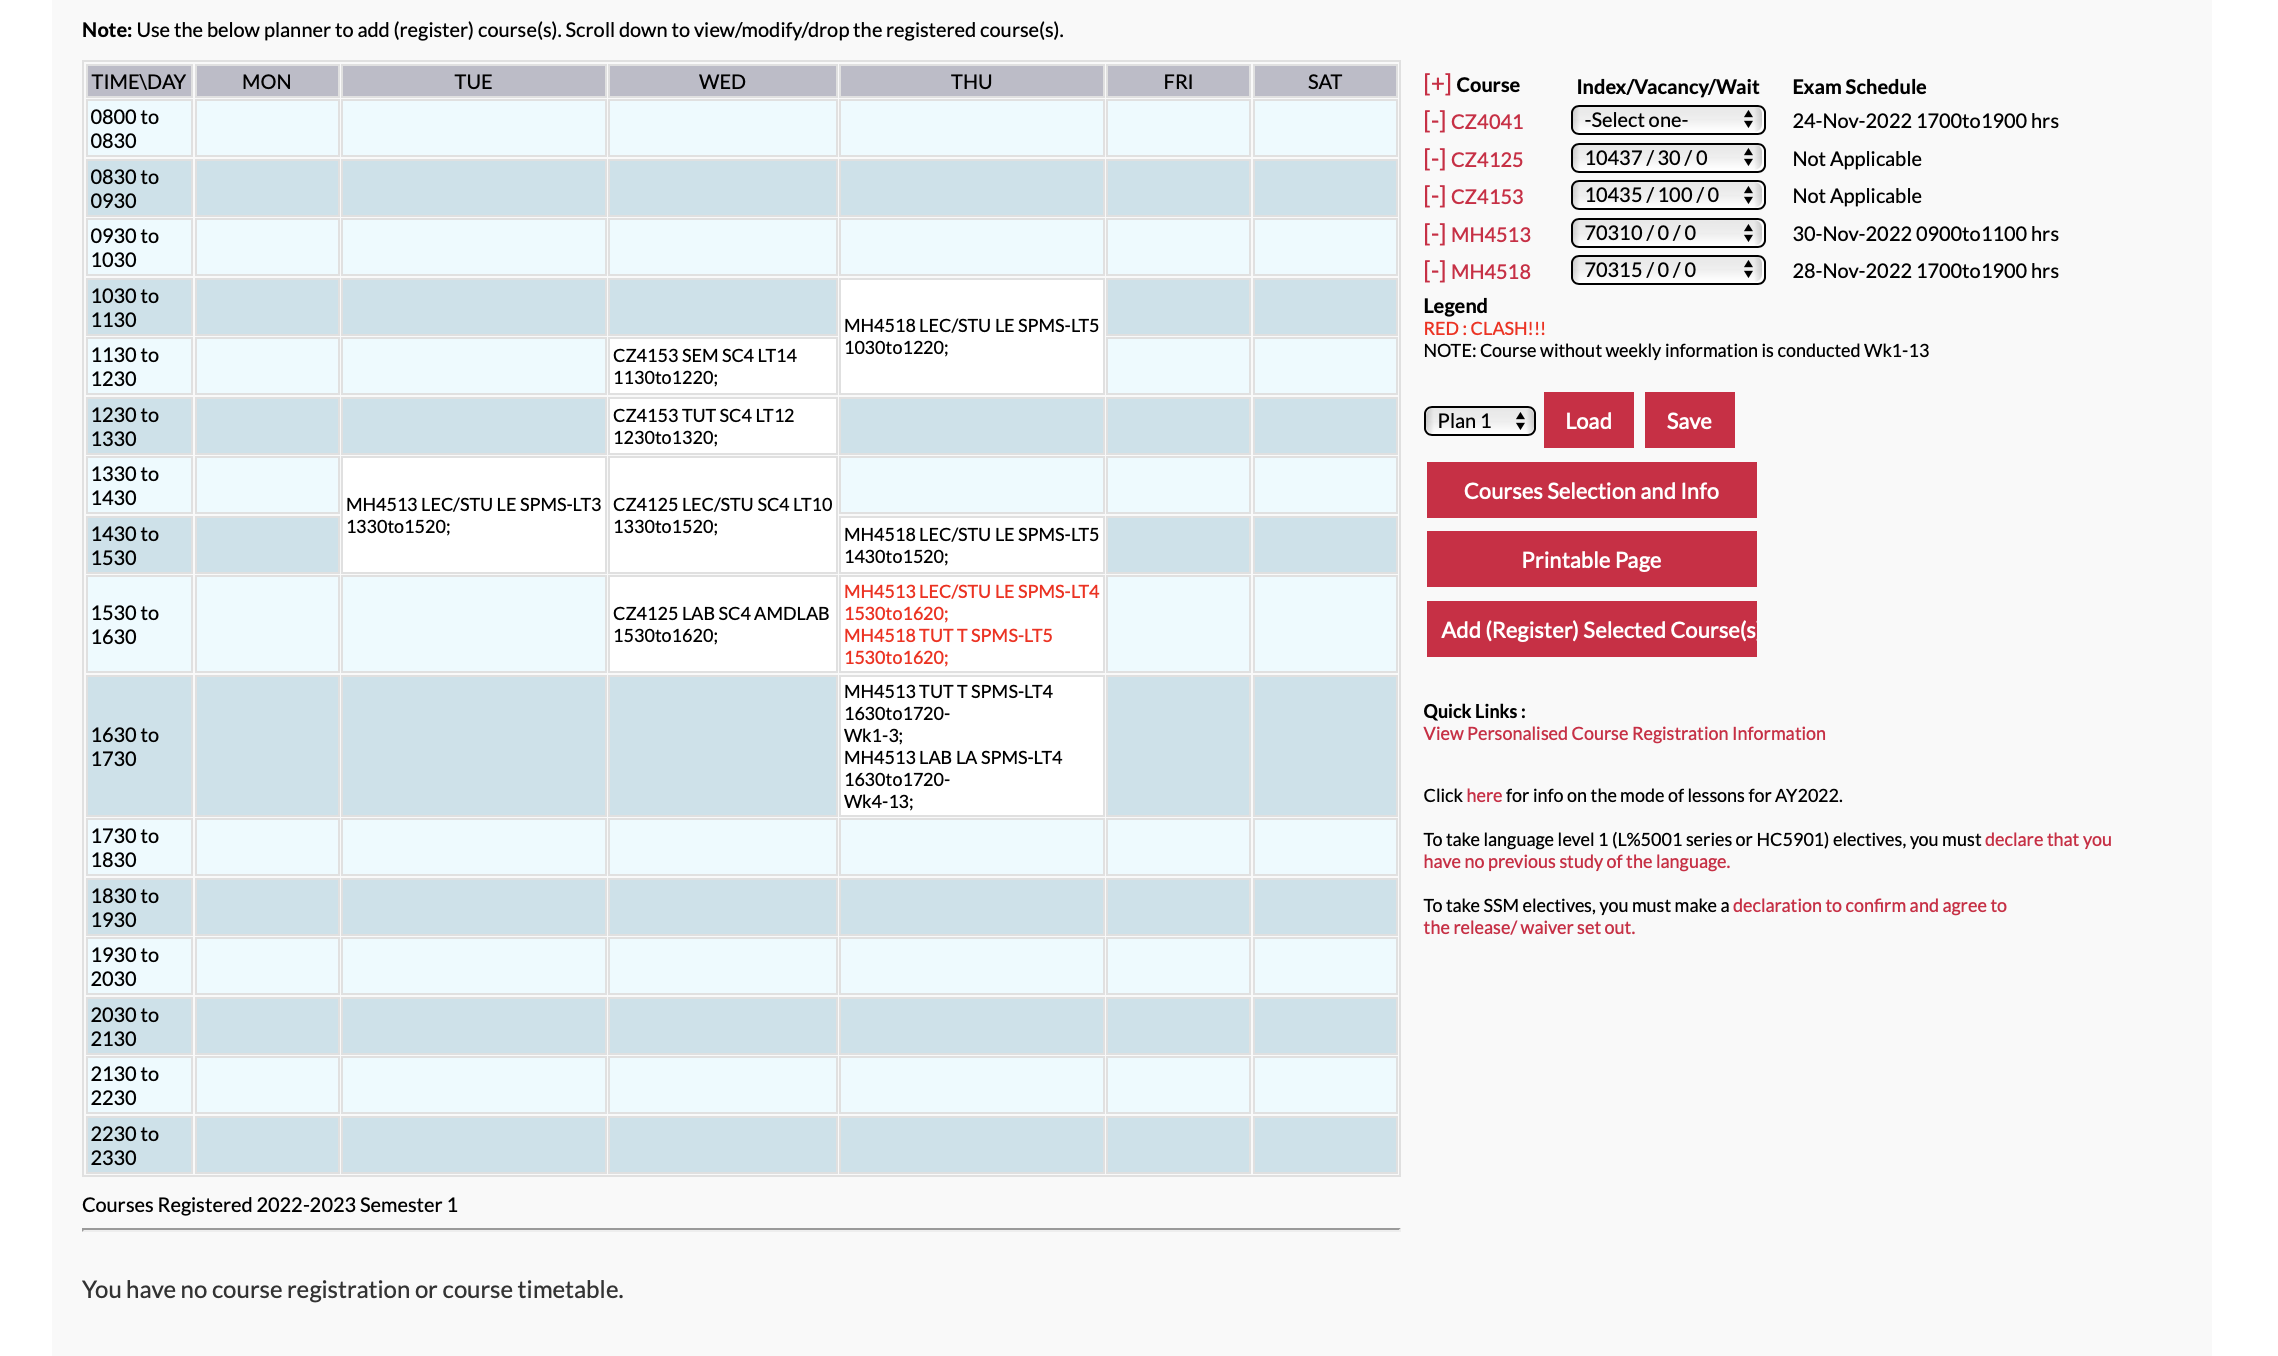
Once you have added a course to your plan, click on the Plan/Registration button on the Selection/Info Page to return to the Calendar view. The column on the right would now have been populated with your selected courses as well as a drop down menu for each course.
Once you select your indexes, the calendar will populate with the timeslot of the index. A red slot indicates a clash. you can then save this plan by clicking on the Save button.
Registering Courses
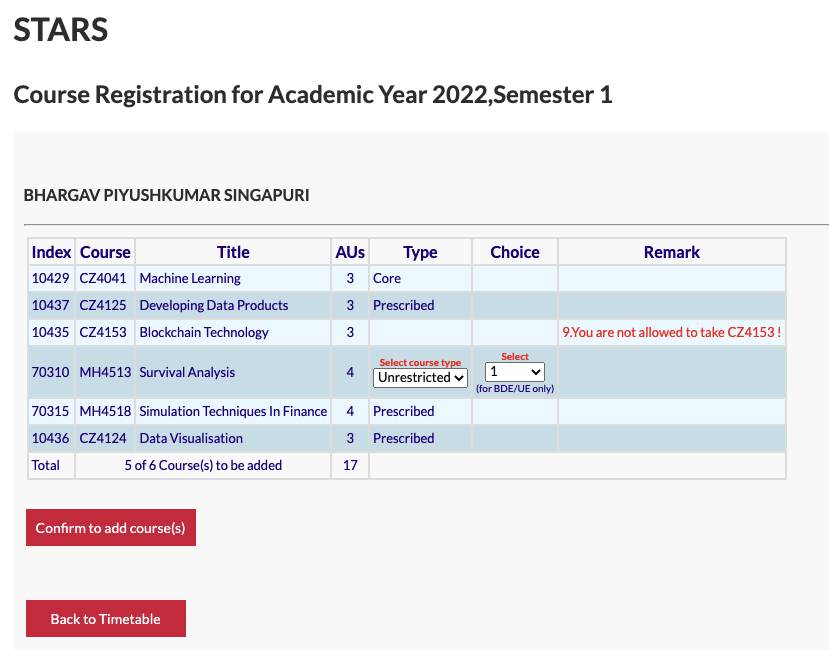
When it comes time to register for the course, all you have to do is to load your plan and press Add (Register) Selected Courses, which will show you the courses that you are applying for as well as any remarks in case you cannot pick a particular course. If you have any Electives in your plan, you will have to declare how you want to classify these electives as well as give priority rankings for BDE/UEs. Once you are satisfied with your choices, click on the Confirm to add courses button to attempt to register your courses.
Try and be as quick as possible with this step. Students that have no rankings/classifications to make will be faster at this step so you will need to be quick in order to be able to register for courses at all.
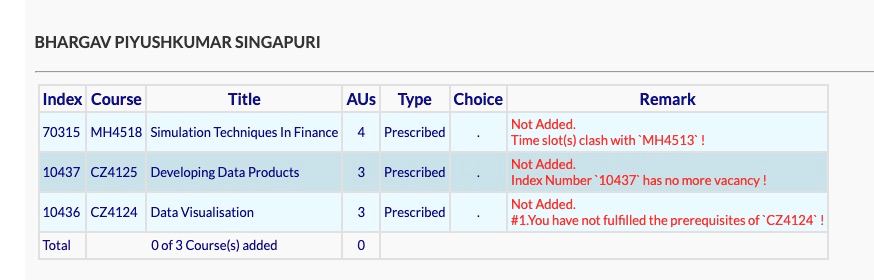
Once that is done, you will see the confirmation screen showing you your registered courses. A successfully registered course will say Done in blue text, as will a Waitlisted module. Examples of unsuccessful registrations are shown below. If for any reason you have not secured your course, you will have to load the index from your backup plans and try to apply for those instead or should the issue be something that can be resolved by filling up the MS Form, proceed to do that instead. Examples include timetable clashes and module waivers.
View Registered Courses
Once you have successully registered for a module or been added to a waitlist, you should see the following at the bottom of your Calendar page.
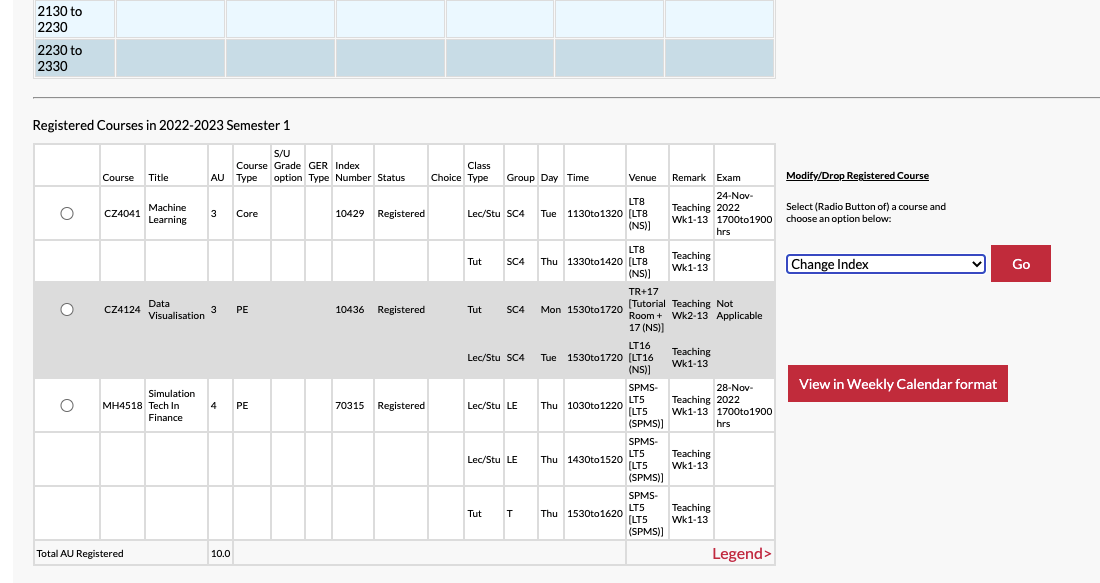
Swapping Indexes
It is always more important to register for the course than to get your ideal slot. There will always be slots available in other indexes for you to choose from. You can also swap indexes during Add-Drop period, which will also give you the ability to register for non-DSAI indexes.
Change Index
For the purposes of this guide, this section refers to your ability to change to a different index unilaterally if there is a vacancy available in the index. To do so, you will have to select the course for which you want to change the index at the bottom of the Calendar screen and choose Change index from the drop-down menu
Choose the index that you want to change to and ensure that there are vacancies in the index.
Swap with Peer
You also have the ability to mutually swap indexes with a peer. Usually when everyone is registering their courses, there will always be students that do not have their index of choice. They will usually message on the respective chatgroup for the year and try to find people to swap with. In order to do this successfully, you will have to choose the Swap with Peer option at the bottom of the page. You will then have to key in each other's Matric number and once both of you have successfully completed the swap, it will be reflected on your Registered courses at the bottom of the screen.
All Set
You should be all set to tackle STARS.

Post Star Wars
Once your slot for STARS has ended, congratulations! You have successfully made it through the second most nerve-wrecking part of the semester. If you have yet to register for any module, do reach out to the relevant school and try to get the waivers before Add/Drop period. Take a break if you need to get your cortisol levels back in order before continuing with the rest of the day.
Notes
- Generally, STARS is the most stressful time of the semester other than Exam season so do take it easy and don't panic if you don't secure your modules of choice.
- It is very common to see the error page when you are attempting to register for your courses. Do not worry and just try to resubmit your courses again.
- If there are module clashes between SPMS modules, you will have to get approval from SPMS to allow you to be able to take both the modules. SPMS unfortunately doesn't have the MS Forms system so you will have to email their undergraduate office. If the clash is between a SPMS and SCSE module, they will generally grant you the waiver if it meets the criteria above.
- If you really must email SCSE Undergraduate office, their address is available here.